Shop with Recipes II Documentation v1.0
Shop with Recipes II
Created: 1/1/2013
Edited: 1/4/2013
By: Justin Zak
Email: [email protected]
Thank you for using Shop with Recipes II. If you have any suggestions or bugs to report (including problems with this documentation), please do so here. Note: screenshots are from version 2.0.9 and minor differences may appear if your device has a newer version.
Table of Contents
- Shopping Lists
- Recipes
- Ingredients
- Convert Measurements
- Preferences
- Adding ingredients and recipes to a shopping list (coming soon)
- Working with sub-recipes (coming soon)
- Other How To Articles (coming soon)
- Glossary (coming soon)
- Sources and Credits
The home screen contains two tabs. The first tab contains a list of the shopping lists you have created. These lists contain the list of ingredients selected by the user, including their quantity.
A) Shopping Lists - top
Shopping Lists Tab
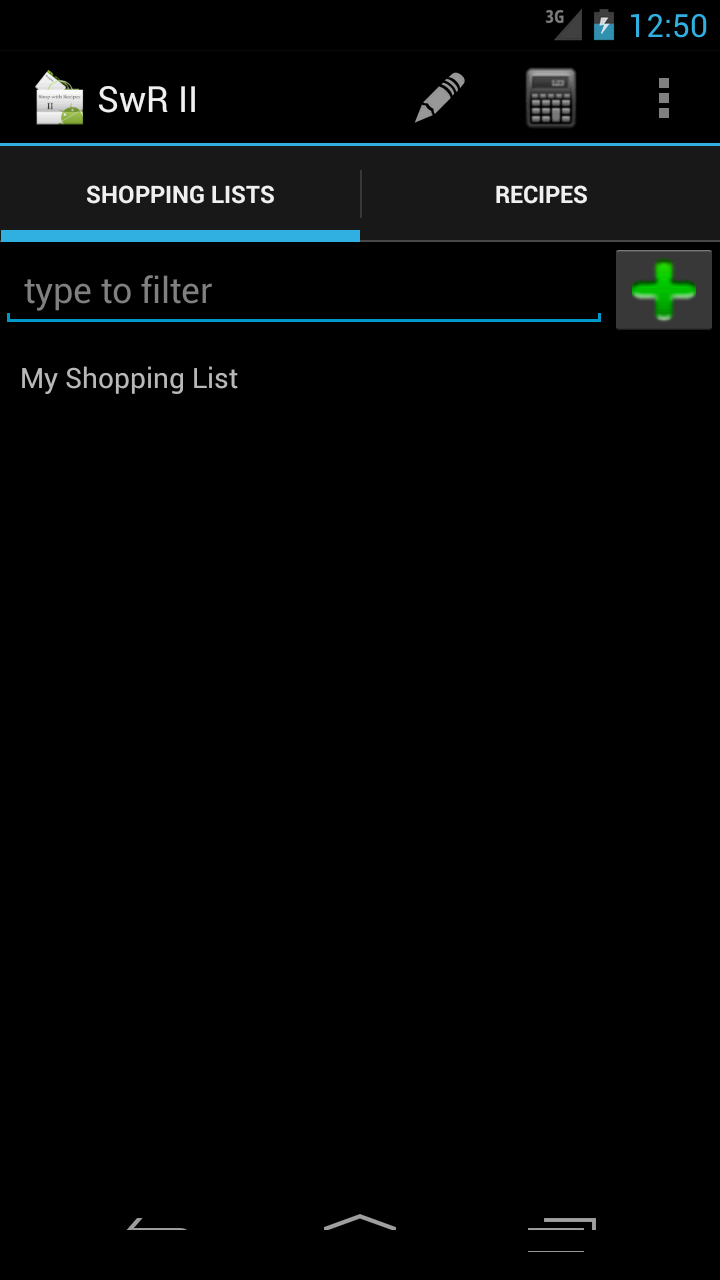
The shopping lists tab displays all of your existing shopping lists. To filter the list, type into the field at the top of the list labeled "type to filter". To add a new shopping list click the plus sign next to the filter field. Touch the name of the shopping list to edit it.
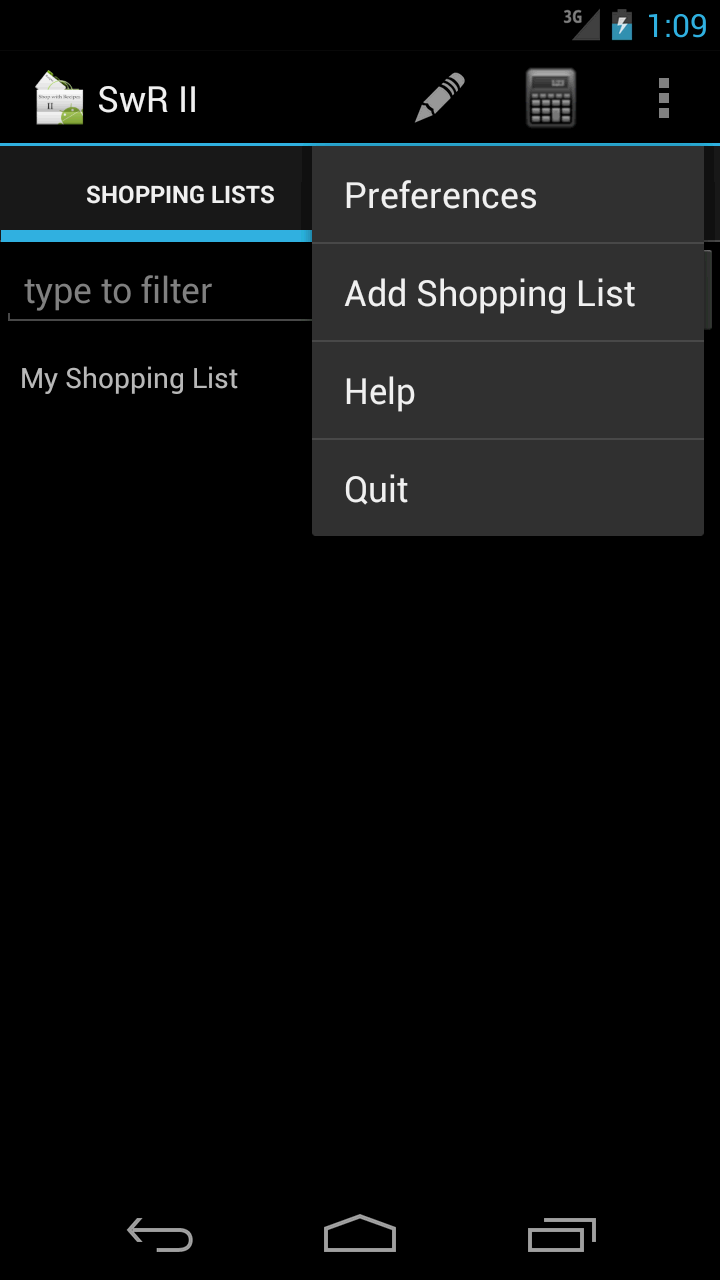
Shopping Lists Main Menu Items
- Ingredients List (pencil icon): Opens the Ingredients List screen
- Convert Measurements (calculator icon): Opens the Convert Measurements screen.
- Preferences (wrench icon): Opens the Preferences screen.
- Add Shopping List: Creates a new shopping list and opens the Edit Shopping List screen with a blank shopping list.
- Help: Opens this help site in the default browser.
- Quit: Closes the Shop with Recipes application
Shopping Lists Context Menu Items
Long pressing an item in the list will open the context menu allowing for the following options.
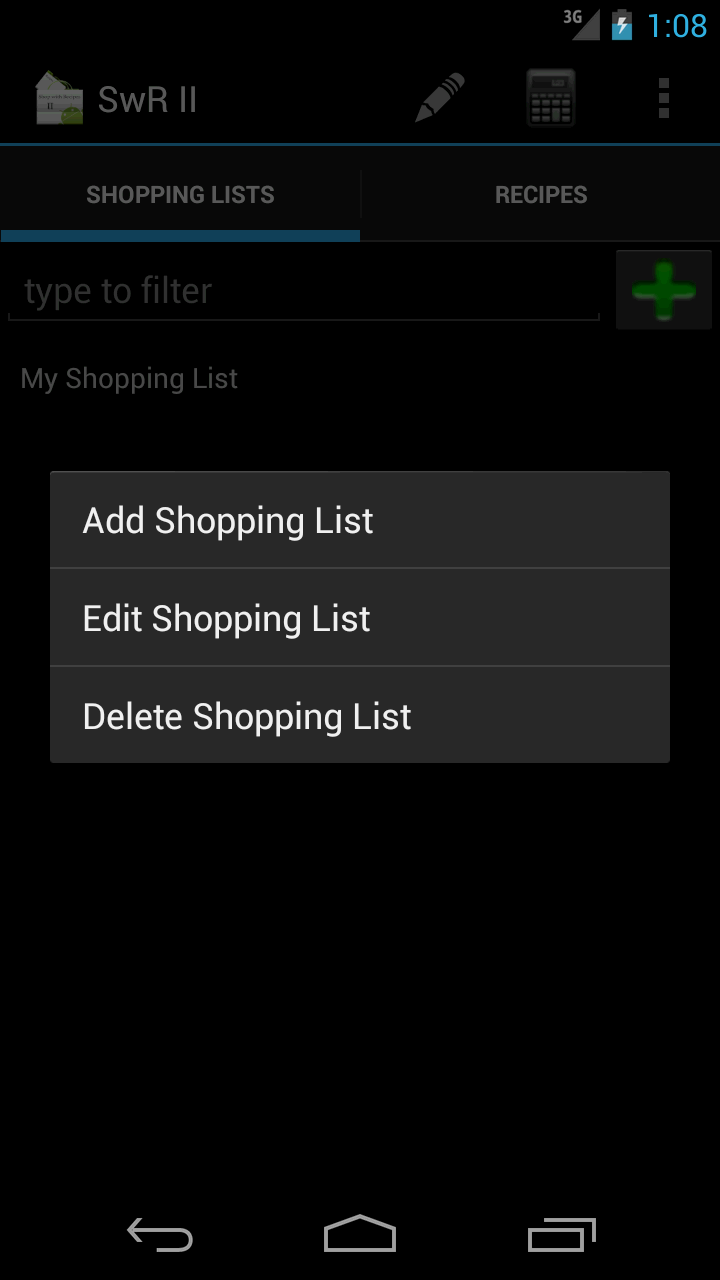
- Add Shopping List: Creates a new shopping list and opens the Edit Shopping List screen with a blank shopping list.
- Edit Shopping List: Opens the Edit Shopping List screen with the data from the item that was pressed.
- Delete Shopping List: Permanently deletes the shopping list that was pressed.
Edit Shopping Lists
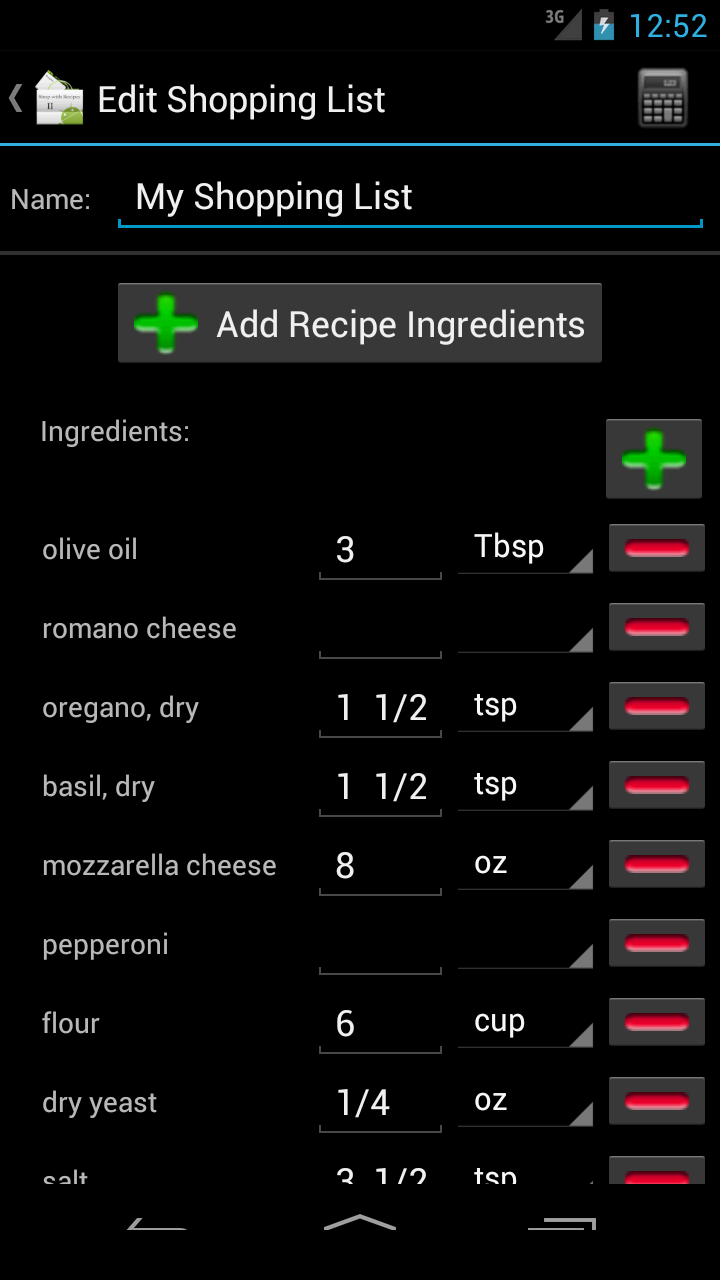
- Name: Add a name to the shopping list. This field is required and must be unique across all shopping lists.
- Add Recipe Ingredients: Opens the list of recipes and adds some or all of the ingredients from the selected recipe to the shopping list. If an ingredient already exists ion the shopping list, it will add the quantity listed in the recipe to the current quantity listed in the shopping list rather than adding a separate ingredient.
- Add Ingredient (green plus): Opens the list of ingredients and adds the selected ingredient to the shopping list. If the ingredient has a default quantity, this quantity will be used on the shopping list.
- Ingredient Rows have 4 columns with the following information
- Name of the Ingredient
- Quantity of the Ingredient (must be numeric or fractional)
- Measurement Abbreviation
- Remove Button (red minus): This button will permanently remove the ingredient from the shopping list.
The Edit Recipe screen contains only one main menu item which allows you to access the Convert Measurements screen.
B) Recipes - top
The home screen contains two tabs. The second tab contains a list of the recipes you have created. These lists contain a list of ingredients that can be added to a shopping list as well as other details about the recipe such as directions for making the recipe.
Recipes Tab
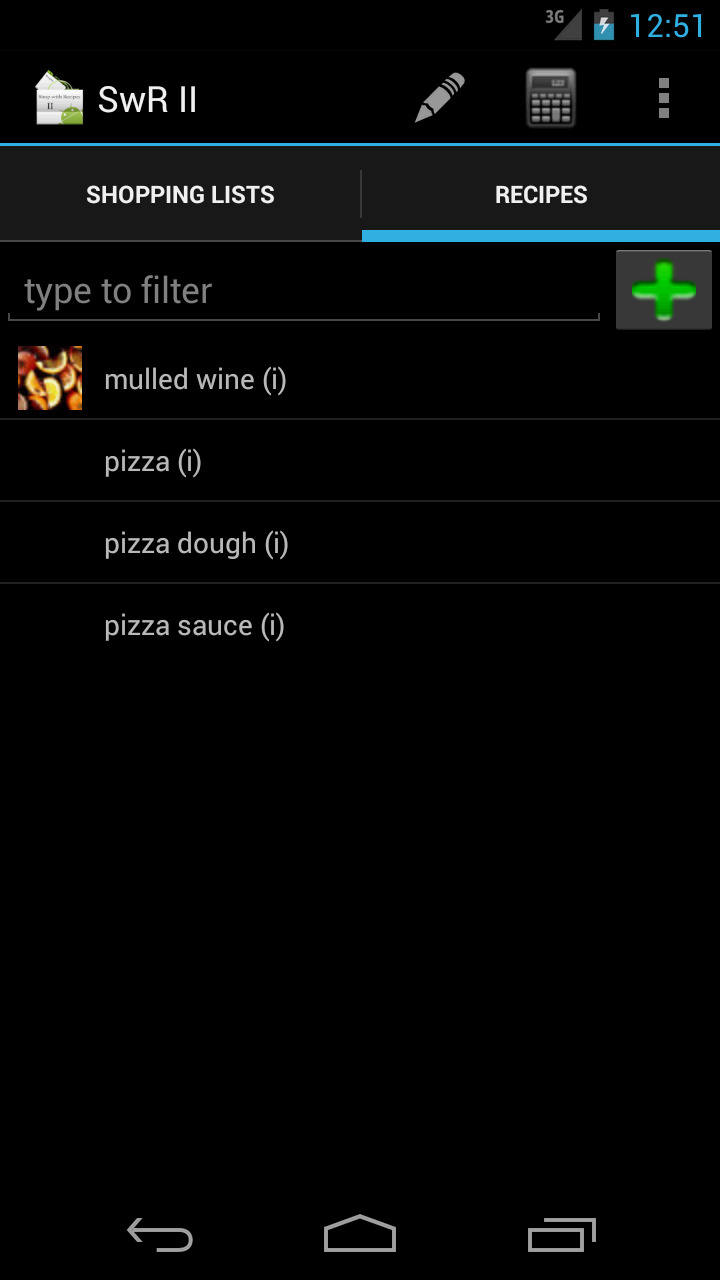
The Recipes tab displays all of your existing recipes. To filter the list, type into the field at the top of the list labeled "type to filter". To add a new recipe click the plus sign next to the filter field. Touch the name of the recipe to edit it. If you have selected a thumbnail from the Recipe Image Gallery for this recipe, it will show up to the left of the recipe name.
Recipes Main Menu Items
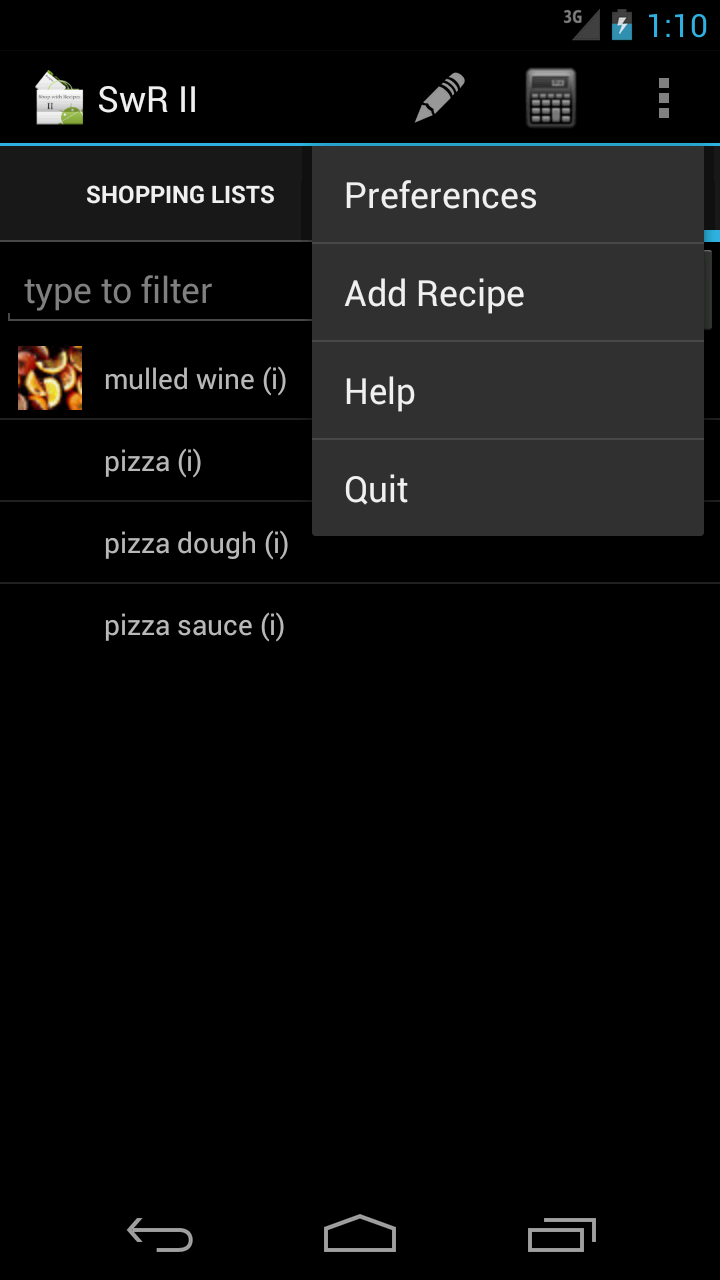
- Ingredients List (pencil icon): Opens the Ingredients List screen
- Convert Measurements (calculator icon): Opens the Convert Measurements screen.
- Preferences (wrench icon): Opens the Preferences screen.
- Add Recipe: Creates a new recipe and opens the Edit Recipe screen with a blank recipe.
- Help: Opens this help site in the default browser.
- Quit: Closes the Shop with Recipes application.
Recipes Context Menu Items
Long pressing an item in the list will open the context menu allowing for the following options.
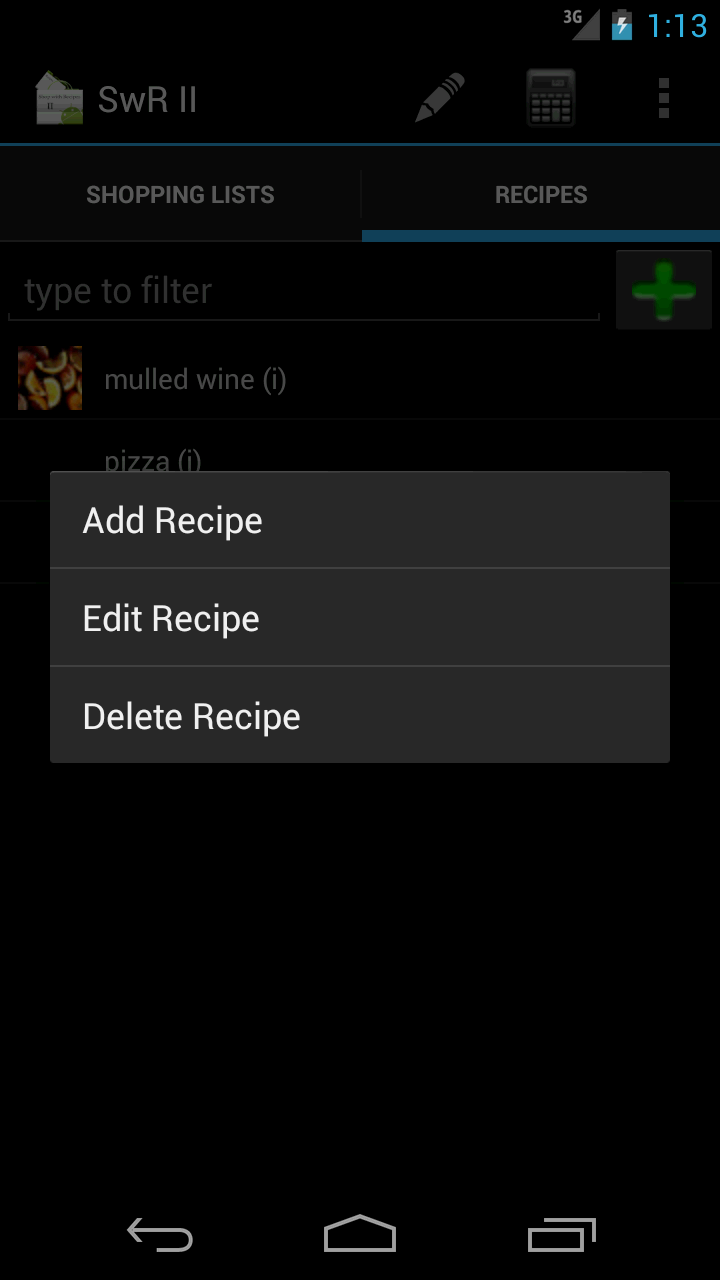
- Add Recipe: Creates a new recipe and opens the Edit Recipe screen with a blank recipe.
- Edit Recipe: Opens the Edit Recipe screen with the data from the item that was pressed.
- Delete Recipe: Permanently deletes the recipe that was pressed.
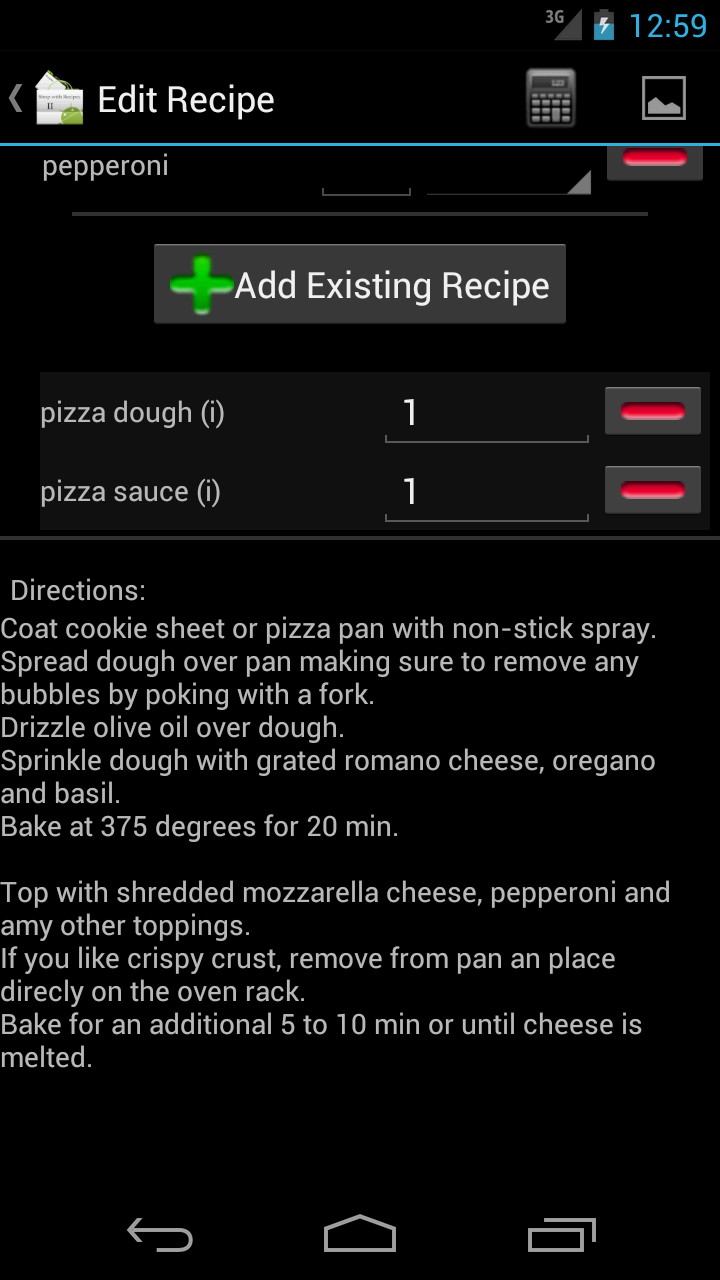
Edit Recipe

- Name: Add a name to the recipe. This field is required and must be unique across all recipes.
- Description: A brief, optional description of the recipe.
- Add Ingredient (green plus): Opens the list of ingredients and adds the selected ingredient to the recipe. If the ingredient has a default quantity, this quantity will be used on the recipe by default.
- Ingredient Rows have 4 columns with the following information
- Name of the Ingredient
- Quantity of the Ingredient (must be numeric or fractional)
- Measurement Abbreviation
- Remove Button (red minus): This button will permanently remove the ingredient from the recipe.
- Add Existing Recipe: Clicking this button will open the recipe list and allow the user to select an existing recipe to add as a "sub-recipe". Note that any recipes that also have sub-recipes added to them can not be selected and will not appear in the list. If a recipe with sub-recipe is added to a shopping list, it will also add the ingredients from the sub-recipe to the shopping list multiplied by the selected quantity of that sub-recipe.
- Sub-Recipe Rows have 3 columns with the following information
- Name of the sub-recipe: touching here will open the sub-recipe for editing.
- Quantity of the sub-recipe (must be numeric or fractional): when adding the main recipe to a shopping list, the sub-recipe ingredients will be multiplied by this number before adding them to the shopping list.
- Remove Button (red minus): This button will permanently remove the sub-recipe from the recipe.
- Directions: A list of directions for making the recipe. Touching anywhere in the text will make the text editable.
- Primary Image: If one or more images are added to this recipe, the first image will be displayed here. Touching the image will open the Image Gallery.
The Edit Recipe screen contains two main menu items:
- Convert Measurements (calculator icon): Opens the Convert Measurements screen.
- Recipe Images (image icon): Opens the Recipe Image Gallery
Recipe Image Gallery
The Recipe Image Gallery contains a list of all of the uploaded images and allows you to perform actions on these images.
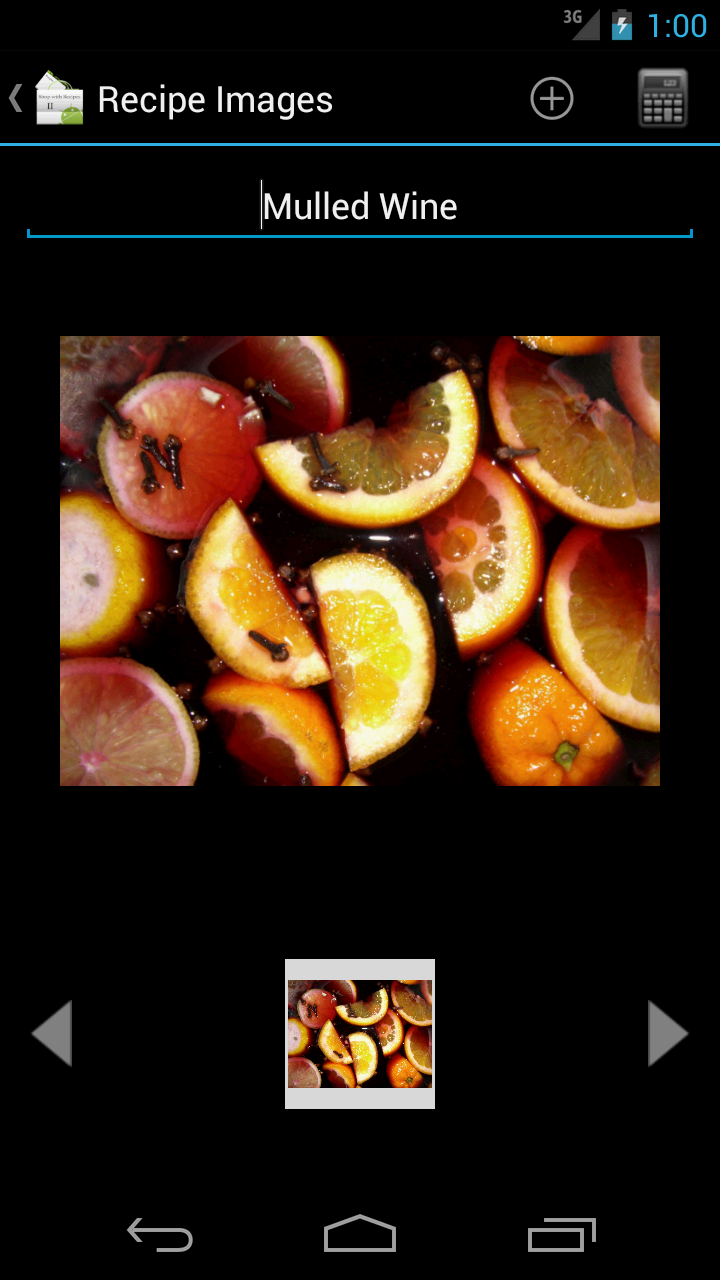
The bottom of the screen contains a list of all images associated with the recipe. Clicking the right and left arrows will scroll through the images if there are more than one. Clicking on an image in the list will display it in larger format above the list.
Once an image is selected from the list, the user can set a name for the image in the field at the top of the screen. Touching an image will bring up several actions to perform on the image.
- Set as Primary: Moves the image to the first spot in the list and this image will now display on the Edit Recipe screen.
- Set as Thumbnail: Creates a thumbnail sized copy of this image which will be displayed in the Recipe List screen beside the recipe name.
- Delete Image: Permanently deletes the image from the recipe.
The Recipe Image Gallery screen contains two main menu items:
- Convert Measurements (calculator icon): Opens the Convert Measurements screen.
- Add Image: Depending on the device, several options may be displayed when this item is selected. If the device contains a camera, the user will be able to take a picture, otherwise an image can be selected from the main gallery or other applications depending on their settings. If the device contains a cropping application, the user will be prompted to crop the image. Note: due to limitations in the default android cropping application, the cropped image must be 256x256 pixels in size. A future release will address this.
C) Ingredients - top
The application uses structured ingredient records to create recipes and shopping lists. The ingredients screens allow the user to modify and add new ingredients as well as custom measurements for those ingredients.
Ingredients List
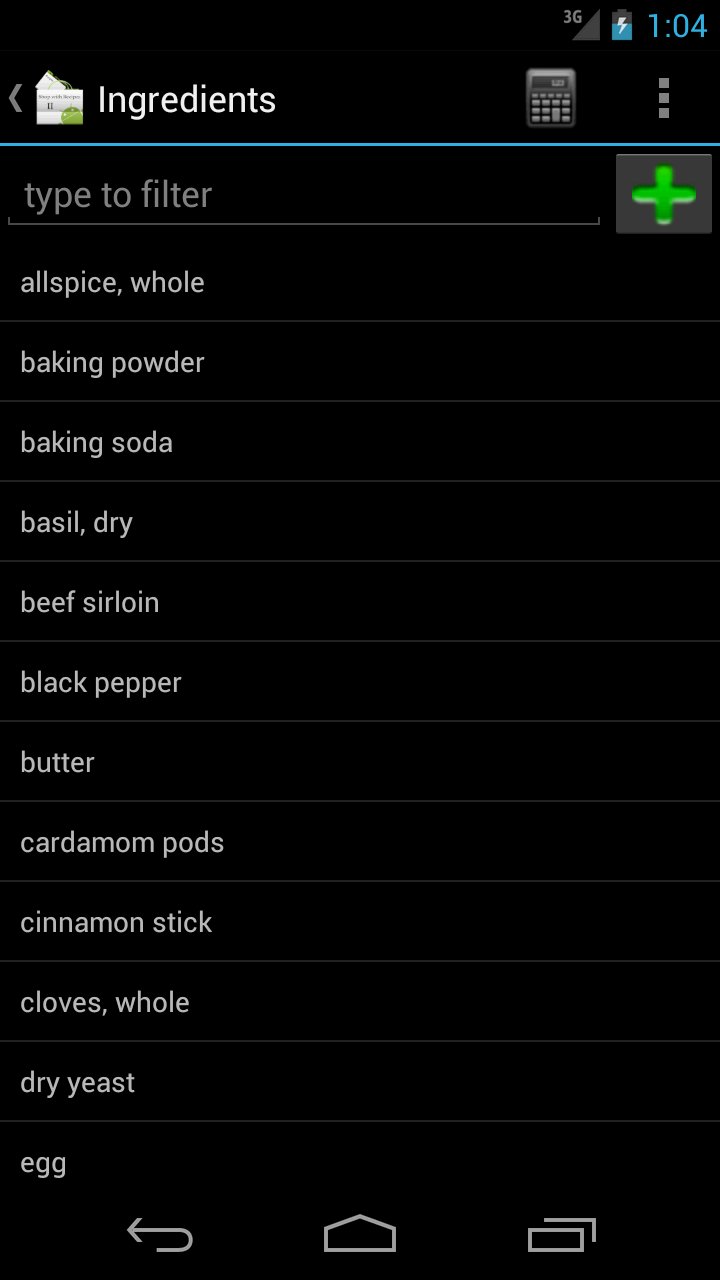
The Ingredients List displays all of your existing ingredients. To filter the list, type into the field at the top of the list labeled "type to filter". To add a new ingredient click the plus sign next to the filter field. Touch the name of the ingredient to edit it.
Ingredients Main Menu Items

- Convert Measurements (calculator icon): Opens the Convert Measurements screen.
- Add Ingredient: Creates a new ingredient and opens the Edit Ingredient screen with a blank ingredient.
- Help: Opens this help site in the default browser.
Ingredient Context Menu Items
Long pressing an item in the list will open the context menu allowing for the following options.
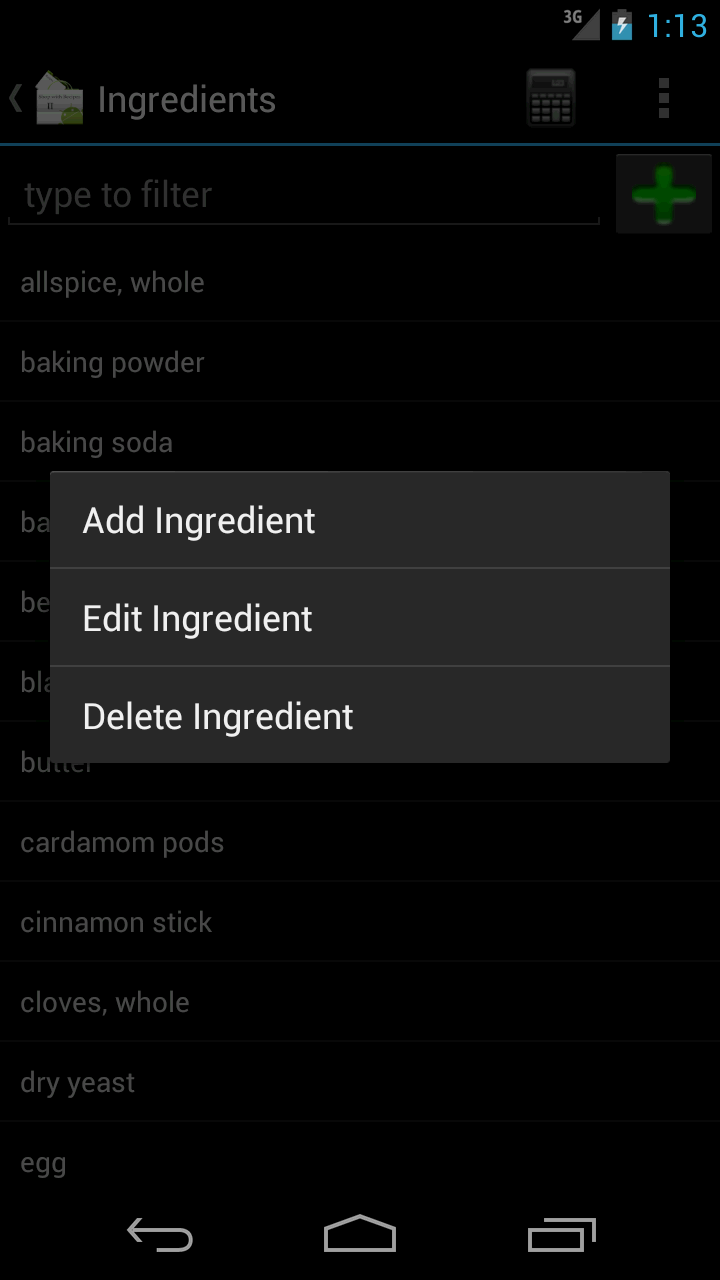
- Add Ingredient: Creates a new ingredient and opens the Edit Ingredient screen with a blank ingredient.
- Edit Ingredient: Opens the Edit Ingredient screen with the data from the item that was pressed.
- Delete Ingredient: Permanently deletes the ingredient that was pressed.
Edit Ingredient
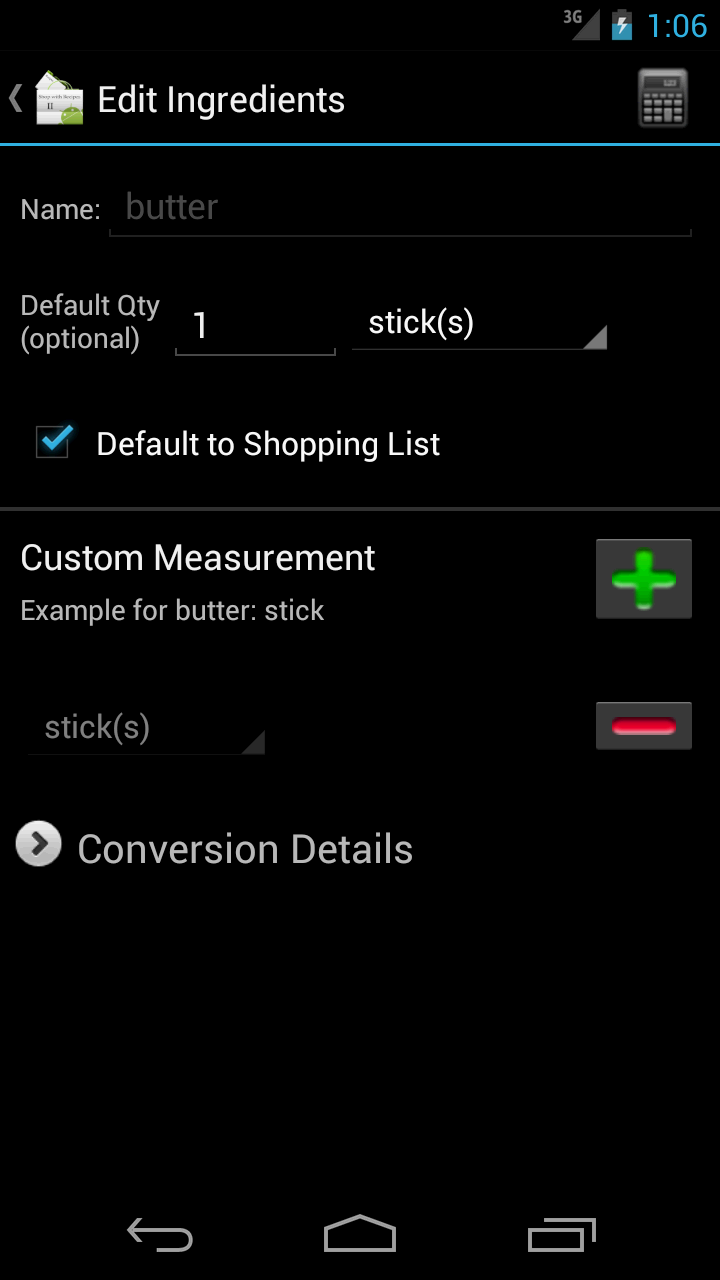
- Name: Add a name to the ingredient. This field is required and must be unique across all ingredients.
- Default Qty: The default quantity and measurement for an ingredient. This will be used when adding an ingredient to a recipe or shopping list.
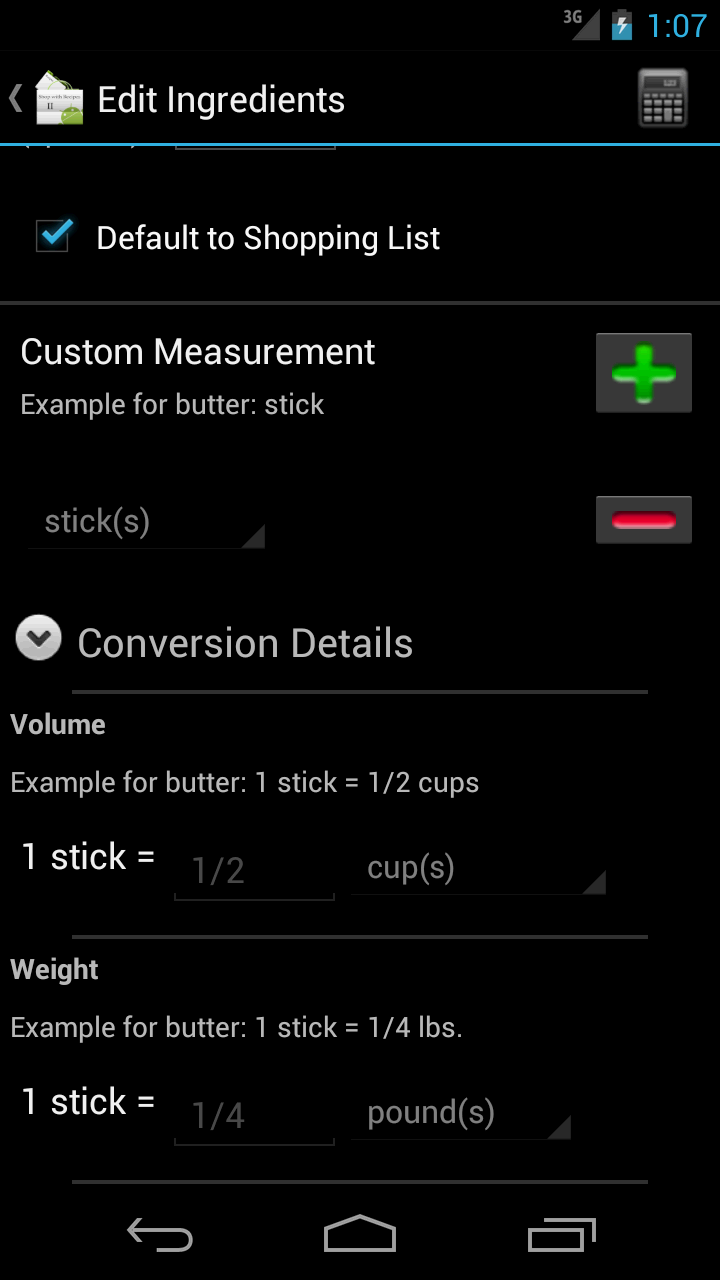
- Default to Shopping List: If this option is not selected, then this ingredient will not be selected by default when adding a recipe to a shopping list. It's useful for ingredients such as water which is usually not necessary to purchase at the store.
- Custom Measurements: Multiple custom measurements can be added to an ingredient. This allows the user to add measurements that are specific to an ingredient. For example, butter is often measured in "sticks". Pressing the green plus button will add a custom measurement. Pressing the red minus will remove the custom measurement it is next to.
- Conversion Details: Each custom measurement can also specify the conversion factor to convert the measurement to a standard measurement. It's highly recommended to populate either the weight or volume conversion details for each custom measurement, but not required. Selecting one conversion to a standard measurement of volume and/or one conversion to a standard measurement of weight will allow converting the custom quantity to any standard measurement. Example: a stick of butter is equal to 1/2 cup in volume and weighs 1/4 lbs. Not all ingredient specific measurements convert to both volume and weight. For example a measurement of "bottle" could be added to wine which is typically 750ml, but not all bottles of wine weigh the same, so the weight would be left blank. Also, not all ingredient specific measurements conform to any standard measurement. For example a "clove" of garlic can vary widely in both volume and weight and thus could not be directly converted to either so both volume and weight would be left blank.
The Edit Ingredient screen contains only one main menu item which allows you to access the Convert Measurements screen.
D) Convert Measurements - top
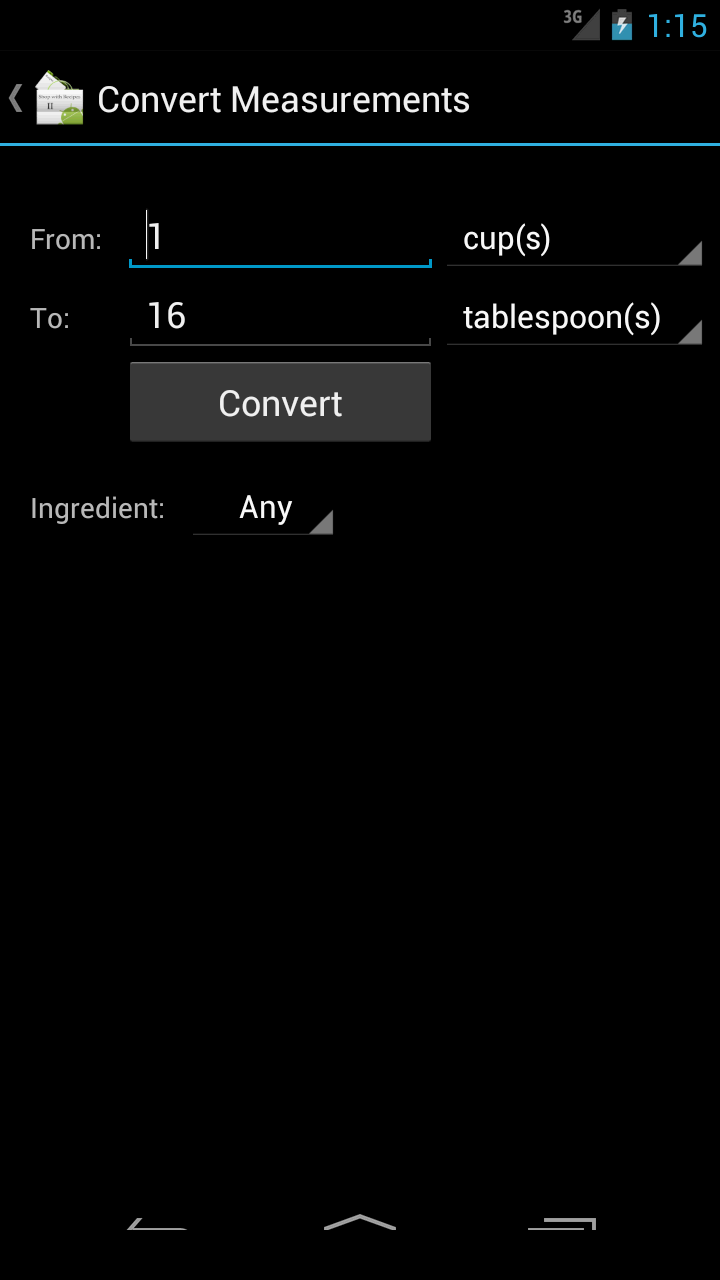
This screen allows the user to calculate measurement conversions. To use it enter a quantity and measurement in the "From:" row and select a measurement from the "To" row. The To quantity field will automatically populate with the converted value. The convert button can also be pressed to trigger the calculation if it does not occur automatically, such as when the cursor is left in the From quantity field. Selecting an Ingredient from the drop down will also allow the user to convert to and from ingredient specific measurements. For example, if the user selects butter from the ingredient list, the measurement "stick(s)" will now appear in the measurement lists above and can be used to convert to or from sticks of butter.
E) Preferences - top
Preferences Screen

- Start Screen: Select which tab will appear when the application is started. This does not affect the Tablet view.
- Disable Advertisements: If checked, disables the ads that appear at the bottom of some screens. This setting may require restarting the application to take effect.
- Disable Crash Reporting: If checked, the application will no longer prompt you to send an error report when the application crashes. It is recommended to keep this option unchecked so that the application can be improved. If you check this option, please send an email if you are receiving repeated crashes so we can fix them.
- Backup to SD Card: Backs up your database to the SD card (or internal storage if the device doesn't have an SD Card). A directory will be created called shopwithrecipes and the file name will be shopwithrecipes2.db.
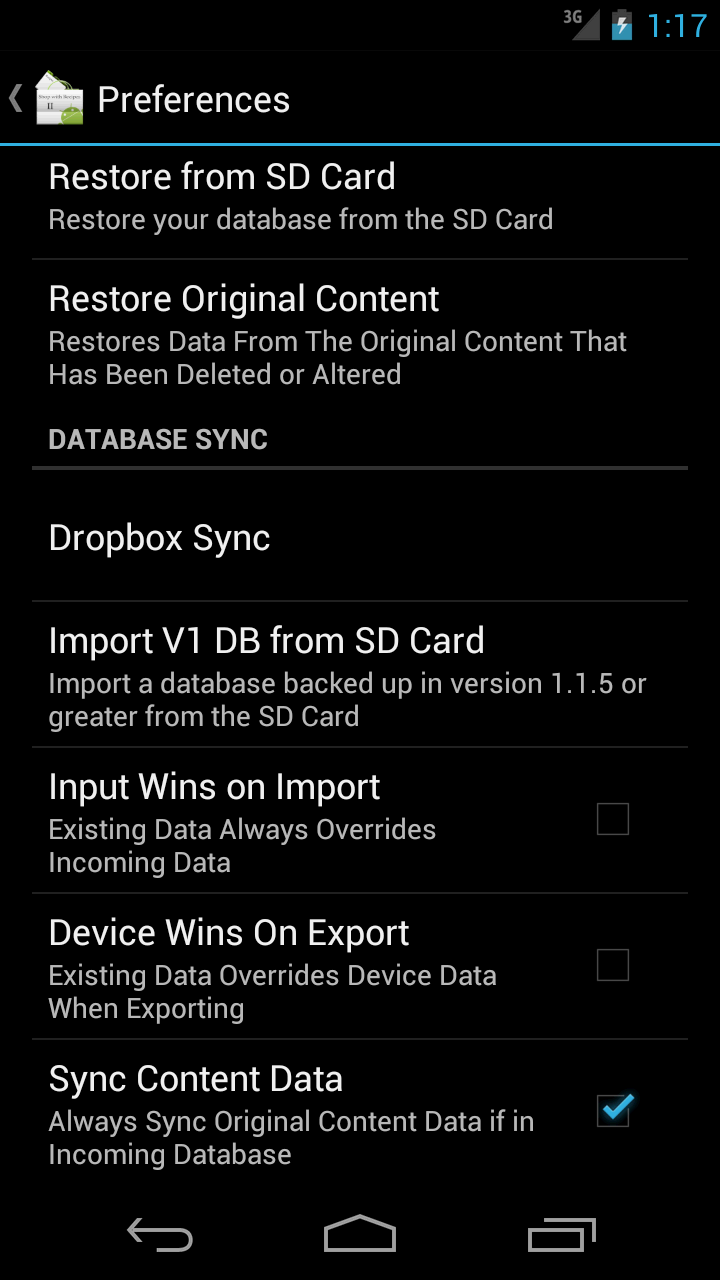
- Restore from SD Card: Restores your database backup from the SD card (or internal storage if the device doesn't have an SD Card). The file must be located in a directory called shopwithrecipes and the file name should be shopwithrecipes2.db.
- Restore Original Content: If the user has made changes to the content that was included with the software originally, this option will restore that data to its original state.
- Dropbox Sync: Opens the Dropbox Sync screen which synchronizes your database with your Dropbox account.
- Import V1 DB from SD Card: If the user has created a database backup in version 1.1.5 or higher of Shop with Recipes, this option will import the data into Shop with Recipes II.
- Input Wins on Import: If checked, if data appears in both the existing database on the device and in the database being imported/synchronized, the application will overwrite the device database in favor of the incoming data. If unchecked, this duplicate data in the incoming data will be ignored in favor of the data on the device.
- Device Wins on Export: If checked, if data appears in both the existing database on the device and in the database being exported/synchronized to, the application will overwrite the external database in favor of the device data. If unchecked, this duplicate data in the external database will remain.
- Sync Content Data: If checked, if the data that was originally included in the application will be overwritten with the data in the incoming database. If unchecked, any changes to the original data that was included with the application which were made in the incoming database will be ignored.
Dropbox Sync Screen
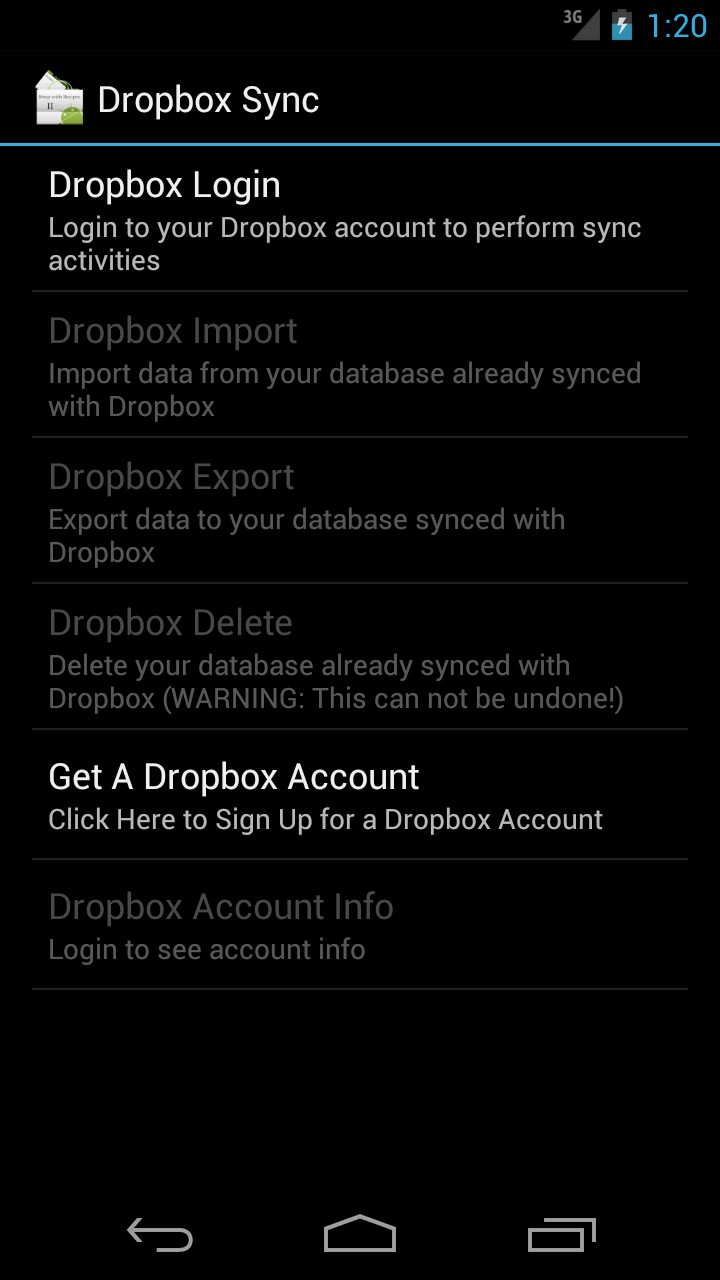
- Dropbox Login: Opens the Dropbox login screen which will prompt the user to allow Shop with Recipes to synchronize data with Dropbox. If the user is already logged in, this option will log out the user.
- Dropbox Import: Imports data from a database that is currently located in the user's Dropbox account and synchronizes that data into the device database. This can be data that was exported from the current device or any other device that has Shop with Recipes II and is logged into the same Dropbox account.
- Dropbox Export: Exports the current device database to the user's Dropbox account. If a database already exist, the application will synchronize the data into the database. This can be used as a backup, or can be imported to other devices with Shop with Recipes II logged into the same Dropbox account.
- Dropbox Delete: Deletes an existing database from the user's Dropbox account. Warning: this could be a database exported from another device, if that device is also logged into the same Dropbox account. This is a permanent delete. This option is not recommended for most users.
- Get a Dropbox Account: If the user does not have a Dropbox account and wishes to use this functionality, this option will take the user to the signup page for a free Dropbox account.
- Dropbox Account Info: If the user is logged into a Dropbox account, this section will display information about the account such as the name on the account and how much space is available.
J) Sources and Credits - top
I've used the following content in the application. Thanks to: